Showing posts with label save money. Show all posts

Thursday, October 27, 2011

I propose a toast: To experiments

The Grow Lab started by the county's Master Gardeners has a circular herb garden (PDF page 2) built out of wine bottles. When I first saw it, I thought, "Wow, I want to do that someday. Good thing I drink a lot of wine."

You'd use wine bottles as a border for a number of reasons. Long wine bottles are a good height for raised beds, and raised beds are helpful with drainage and keeping the soil warm. Bottles don't decay or wear down. Bottles are sturdy and pretty. And, also, why the heck not?

Fast forward a couple years, and I still had the inclination, finally had secured the location, but didn't have enough of the bottles for the experimentation.

I put the word out to local friends (like Leslie at Tea with Iris) that I needed their help collecting wine bottles, plus I went by a wine bistro and asked them to save a few cases for me. Soon after I had enough bottles to start my project. 

 
With the first batch of bottles, I scrubbed off the labels with soap, water and steel wool.


It took a long time.


I inserted the bottles neck-down into soil that I had softened up with a shovel. 

To keep the bottles in a straight line while I planted them, I used long 2-by-4s left over from a previous project.
Then I piled up soil and mulch on the outside and put my best compost and soil on the inside. The interior level is about 4 inches higher than the exterior level. 
With the second batch of bottles, I didn't take off the labels. I know, lazy.

This is also a beneficial bug experiment. To draw out the good guys, I planted sweet alyssum, lobelia, pansy, borage, viola, calendula and chamomile, plus 3 sages, 2 basils, parsley and a thyme. Here you can see a purple sage (outside) and the top of a purple sweet alyssum (inside).
Oh yeah, almost forgot! I've also got three tomatoes, brussels sprouts, pak choi and red & white onions growing. Really cannot wait to see how the colors explode here. So far everything looks super healthy.
If there is any hint of frost, I'll cover the whole thing with a large sheet/blanket using the tomato cages. (I was going to make those circular tomato houses out of chicken wire this year, but instead decided to save money and use what I have.)

So do you think it looks better with or without labels?

Thursday, September 29, 2011

Why not do your best with what you've got?

In the past I've had others make garden beds for me. Or I've used an existing community garden bed. But now that I have
  1. More room
  2. More time
  3. My own space, with no one (such as an HOA) telling me how it should look
  4. Secret weapons (scrap materials, kind neighbors, helpful family members, leftovers from other projects)
... well, all those things made it easier for my family to do it on our own.

I'm proud of anyone who takes on the task of growing their own food, no matter how it is accomplished. Of course, I think it's important to challenge yourself, but you've also got to be realistic about your capabilities and use what you have! That could mean searching your attic or shed for materials, hitting up neighbors for help or scrap materials, or even asking a handy friend to build your garden for you, if that's what it takes.

The process (which took more than a week):

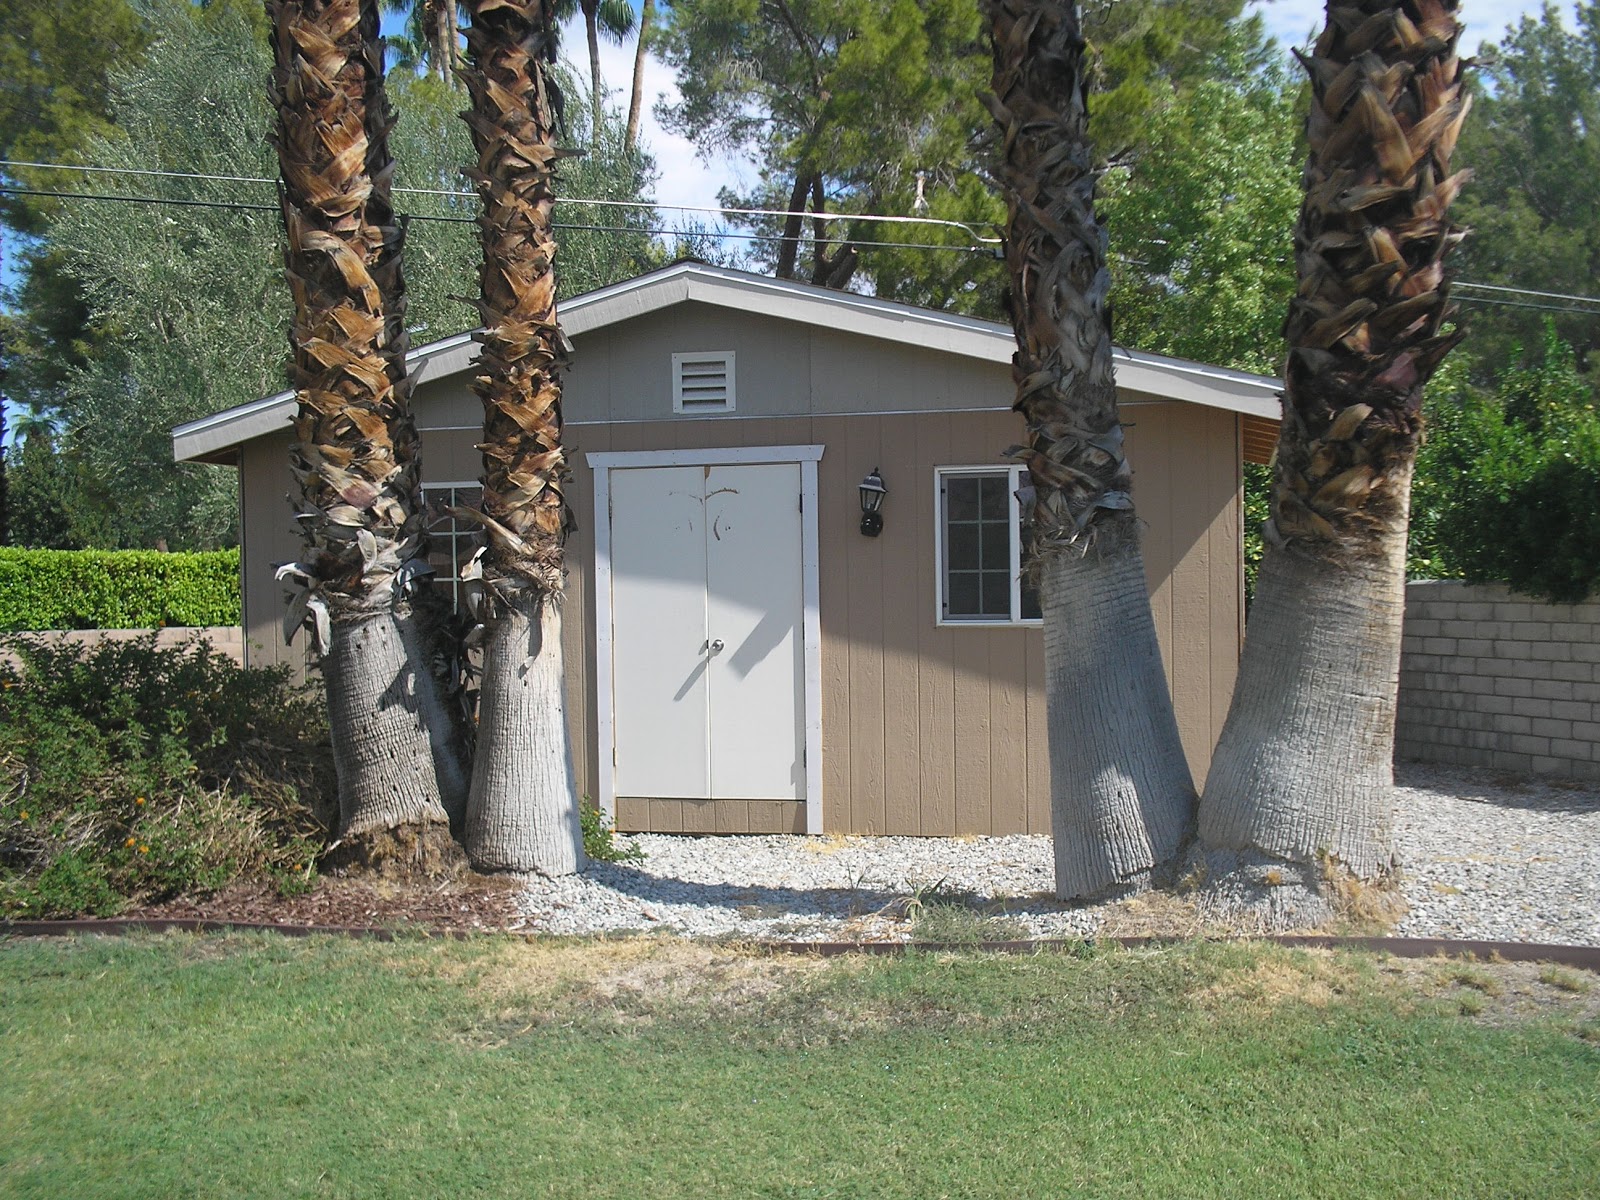
What's that? A shed? Let's check out what's inside.


Look at all these construction materials the former owners left in here! What can we use to make a raised bed? There are unused fence posts, drywall, untreated 2-by-4s, bricks, cement, tiles, paint buckets, a mirror ...

I think I know what we'll use.
Now, I need to choose where we want to place the bed. A nice sunny spot near the house. Sounds great! Only problem is that I have to dig up about 4 inches of pebbly cover material before reaching the soil.

So I scrape it off, then double-dig about 4 inches lower to till up the sandy soil underneath.


I carry a bunch of the 2-by-4s over to my neighbors', and he uses his table saw to cut them into the pieces for my keyhole design. Then I take them back and drill them together with galvanized screws ($8.50 a box).

I am not handy. This drilling takes a long time. And it probably is not done "correctly."
Good thing my main man is working on the sprinklers out front and we have a bunch of extra soil. I need that soil for the garden!

We truck all the soil back in a wheelbarrow. Now I'm mixing all the sandy desert soil from the front yard with mulch and other good stuff.

My 2-year-old and 4-year-old help me carry the 12-by-6 frame over. We set it on the hard gravel material, then start filling it up with soil. Note the bricks from the shed, used in the keyhole! A soaker hose left over from last year's community garden bed is installed an inch underneath the topsoil.

The finished bed is ready for planting. I'll let it settle for a few days.


Total cost: about $25 for the box of nails and the soil amendments. The rest of the materials were on site.


Let's see if we can get anything to grow in here!

Wednesday, July 20, 2011

Flailing

We lost our camera at the park during Fourth of July fireworks (which were spectacular).

Timing could not be worse. I want to take pictures of everything right as we are moving in, to get all the "pre" photos.

A new camera is not affordable right now, so I am going to have to come up with something! 

Thursday, March 31, 2011

Herb garden

I love Southern California winters (and early spring). My front-porch container garden is growing beyond my wildest dreams. It's only going to last until around June though, when sizzling weather will force everything into the more protected back patio. But I'll enjoy it for now.
I changed this area from a 10x10x12-foot triangular, flat, 4-foot-tall shrub to a protected space big enough for about 25 different herb, vegetable and flower species in containers. I've got oregano, mexican oregano, chives, garlic chives, rosemary, rue, chervil, savory, viola (edible flowers), parsley, basil, English thyme, lemon thyme, pineapple sage, jerusalem sage, sage, 5 strawberries, sweet marjoram, dill, cilantro, a bunch of lettuce, radishes, spearmint and a tomato.
Couldn't do without? The chives, cilantro, lettuce, strawberries, oregano, parsley, rosemary and -- definitely -- the sages (gorgeous flowers).
Just for fun? Chervil, savory, rue, dill (don't really like it), radishes and thymes.

Wednesday, March 16, 2011

Paper towels: Not necessary

My third "Sustainable Tip" for Growcology's March newsletter:

With paper towels, "disposable" is an understatement. Their purpose is to be used once and discarded. Many things you do with a paper towel (mop up spills, wipe counters, clean kids' faces, dry your hands) can also be taken care of with a cloth. What's stopping you? Using cloth instead of paper saves both money and trees.

To get started, collect your cloths. You'd be surprised how many cloths you have within reach. You can use stained table napkins, worn T-shirts, clean cloth diapers, old dish towels or pretty much any fabric items that have run their course. Keep a clean stack or two of these in a drawer or under the sink -- possibly separated into a "nice" stack for drying/wiping things and a "yucky" stack for big messes. (You'd wipe your hands or face with cloths from the "nice" stack, but not from the "yucky" one.)

After using a cloth, either rinse and line dry it or rinse, wring and throw it in the washing machine until your next wash. Soon enough, you'll be weaned off your paper towel habit.

Sunday, May 30, 2010

Next project ... on the line

When we first moved into our house in 2004, this strange round contraption was attached to the wall of our enclosed patio, about 6 feet high. It took me a few weeks to get around to inspecting it closely enough to figure out it was a clothesline.

Ingenious, in good working condition, and probably about 25 years old. If you pulled it all the way out, you could attach it to a hook that was installed on the opposite wall. And it wound up like a tape measure when you let it go.

Forgive me, but I promptly detached it from the wall and threw it away. (See where it used to be, at left) Looking back, I think I didn't like how it was right outside the sliding door where you could almost hit your head on it. And I probably thought I would NEVER dry my clothes outside because I finally had my own dryer.

My goal this summer is to make use of the intense desert heat, and save some energy at the same time. I love my dryer, but it heats up the house as I'm air-conditioning it.

Seriously, it probably will take LESS time to dry my clothes in the bone-dry 110-degree sun! Can't wait to try this. On the lookout for a new (or used) contraption similar to the old one.

Wish I had some foresight back in 2004.

Friday, January 8, 2010

Spit and vinegar

At Costco a few weeks ago I bought a 5-liter (1.32-gallon) bottle of white vinegar. It cost a little over $3. The thing is huge. It was on my kitchen counter for a while as I considered how I would use it.


Apparently, using vinegar is a green way to clean. According to both new (Internet) and old (my mom) wives' tales, when diluted in varying strengths, its acidity breaks up soap scum and stains in the kitchen and bathroom and it spitshines windows and mirrors.


My question: If something works this well and is so cheap, why do we have Tilex, Comet, Windex and other foul-smelling, chemical-filled, expensive cleaners?

Test No. 1: Mirrors. I filled half a large measuring cup with vinegar and then topped off the rest with water. It didn't smell too badly. In my toddler's room I dipped a clean old diaper cloth into the mixture and wiped down his mirrored closet doors. They were filthy, covered with fingerprints. Using a clean newspaper, I made circular motions to dry off the vinegar solution on the mirrors. It worked very well, just as good as--if not better than--Windex. The mirrors dried super-clean, no streaks. Grade: A-

Test No. 2: Windows. Feeling good after the mirrors, I moved on to the kitchen window that always gets hard water stains on the outside and on the inside still had some specks of a shade material I had scratched off last year. Using the same measuring cup solution, I cleaned the outside and dried with the newspaper. All the hard water stains came off with a little elbow grease. Inside, the vinegar was able to dissolve whatever stickiness the specks had left. They all came off. I got anal and saw I could do better outside, so I cleaned it again. Now the sunniest window in my house was sparkling. Grade: A

Test No. 3: Toilet. I was on a roll, cleaning, so I headed to the bathroom. The measuring cup solution was all gone. I poured straight vinegar into the toilet bowl, let it sit a bit, then whisked around with the brush. Some hard water stains came off and the vinegar must have been dissolving something in there because the water looked very dirty. After I flushed, I thought it looked good, but I'll have to get used to no scrubbing bubbles or flower-fresh smell. Grade: B+

Test No. 4: Bathtub. There was a strange red line of something on the edge of the tub where it met the tile. But I eschewed the toxic Tilex Atomic Mold Destroyer spray I own and just poured straight vinegar on the stain. Using a brush, I scrubbed the red right off. Then I used more vinegar and the brush to scrub the rest of the tub very shiny, including soap scum stains off the chrome fixtures. And I did not faint from the fumes, nor need to have an open window, as I would have with Tilex. Grade: A

Approximately 3 cups of vinegar was used, probably about 25 cents worth. I can do this vinegar thing. (But, help! Now what should I do with all those chemical cleaners filling my under-sink cabinets?)