Showing posts with label challenge. Show all posts

Thursday, October 27, 2011

I propose a toast: To experiments

The Grow Lab started by the county's Master Gardeners has a circular herb garden (PDF page 2) built out of wine bottles. When I first saw it, I thought, "Wow, I want to do that someday. Good thing I drink a lot of wine."

You'd use wine bottles as a border for a number of reasons. Long wine bottles are a good height for raised beds, and raised beds are helpful with drainage and keeping the soil warm. Bottles don't decay or wear down. Bottles are sturdy and pretty. And, also, why the heck not?

Fast forward a couple years, and I still had the inclination, finally had secured the location, but didn't have enough of the bottles for the experimentation.

I put the word out to local friends (like Leslie at Tea with Iris) that I needed their help collecting wine bottles, plus I went by a wine bistro and asked them to save a few cases for me. Soon after I had enough bottles to start my project. 

 
With the first batch of bottles, I scrubbed off the labels with soap, water and steel wool.


It took a long time.


I inserted the bottles neck-down into soil that I had softened up with a shovel. 

To keep the bottles in a straight line while I planted them, I used long 2-by-4s left over from a previous project.
Then I piled up soil and mulch on the outside and put my best compost and soil on the inside. The interior level is about 4 inches higher than the exterior level. 
With the second batch of bottles, I didn't take off the labels. I know, lazy.

This is also a beneficial bug experiment. To draw out the good guys, I planted sweet alyssum, lobelia, pansy, borage, viola, calendula and chamomile, plus 3 sages, 2 basils, parsley and a thyme. Here you can see a purple sage (outside) and the top of a purple sweet alyssum (inside).
Oh yeah, almost forgot! I've also got three tomatoes, brussels sprouts, pak choi and red & white onions growing. Really cannot wait to see how the colors explode here. So far everything looks super healthy.
If there is any hint of frost, I'll cover the whole thing with a large sheet/blanket using the tomato cages. (I was going to make those circular tomato houses out of chicken wire this year, but instead decided to save money and use what I have.)

So do you think it looks better with or without labels?

Thursday, September 29, 2011

Why not do your best with what you've got?

In the past I've had others make garden beds for me. Or I've used an existing community garden bed. But now that I have
  1. More room
  2. More time
  3. My own space, with no one (such as an HOA) telling me how it should look
  4. Secret weapons (scrap materials, kind neighbors, helpful family members, leftovers from other projects)
... well, all those things made it easier for my family to do it on our own.

I'm proud of anyone who takes on the task of growing their own food, no matter how it is accomplished. Of course, I think it's important to challenge yourself, but you've also got to be realistic about your capabilities and use what you have! That could mean searching your attic or shed for materials, hitting up neighbors for help or scrap materials, or even asking a handy friend to build your garden for you, if that's what it takes.

The process (which took more than a week):

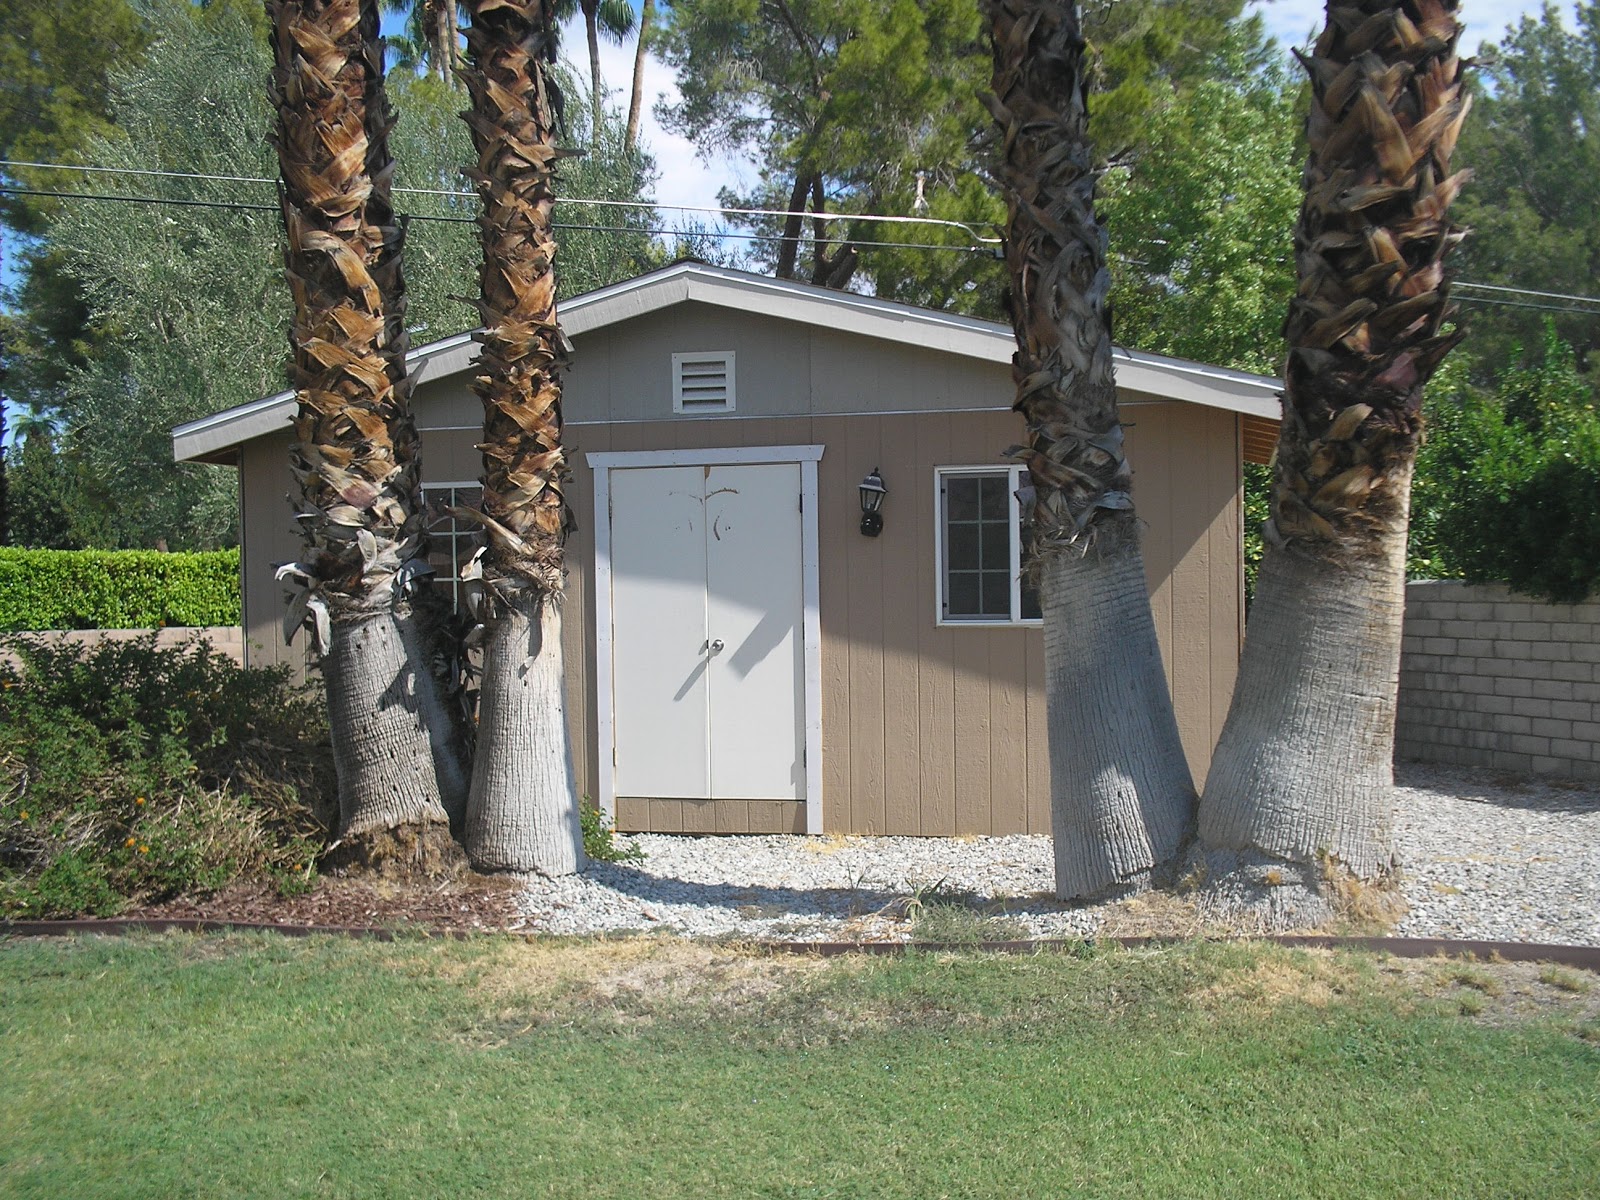
What's that? A shed? Let's check out what's inside.


Look at all these construction materials the former owners left in here! What can we use to make a raised bed? There are unused fence posts, drywall, untreated 2-by-4s, bricks, cement, tiles, paint buckets, a mirror ...

I think I know what we'll use.
Now, I need to choose where we want to place the bed. A nice sunny spot near the house. Sounds great! Only problem is that I have to dig up about 4 inches of pebbly cover material before reaching the soil.

So I scrape it off, then double-dig about 4 inches lower to till up the sandy soil underneath.


I carry a bunch of the 2-by-4s over to my neighbors', and he uses his table saw to cut them into the pieces for my keyhole design. Then I take them back and drill them together with galvanized screws ($8.50 a box).

I am not handy. This drilling takes a long time. And it probably is not done "correctly."
Good thing my main man is working on the sprinklers out front and we have a bunch of extra soil. I need that soil for the garden!

We truck all the soil back in a wheelbarrow. Now I'm mixing all the sandy desert soil from the front yard with mulch and other good stuff.

My 2-year-old and 4-year-old help me carry the 12-by-6 frame over. We set it on the hard gravel material, then start filling it up with soil. Note the bricks from the shed, used in the keyhole! A soaker hose left over from last year's community garden bed is installed an inch underneath the topsoil.

The finished bed is ready for planting. I'll let it settle for a few days.


Total cost: about $25 for the box of nails and the soil amendments. The rest of the materials were on site.


Let's see if we can get anything to grow in here!

Tuesday, September 20, 2011

A Case of Gardener's Block

Temperatures have been lower, so the past few days I've been walking my backyard, sketching it, considering it, photographing it, considering it ... everything but DOING something in it.

I started a few seeds indoors for broccoli and lettuce, but my mental now-now-now push to plant a vegetable garden outside, well, it's been waking me up in the middle of the night.

Warning: "Before" photos ahead!

Former planned site for vegetable garden.
South-facing back fence, shed and
black cat Deuce (she says hi).
I thought I knew where I was going to put a huge lasagna mulch for the foundation of my vegetable garden. Now after studying it for a few days, it seems like that area is too shady. So am I going to cut down two trees or choose a new spot?

Something must be planted soon or I think I am going to miss this growing season.

Plus: Close to house. Irrigation ready.
Minus: Close to house. Not a large space. 
My other two potential vegetable garden sites are not as ideal; they would require more work (removal of gravel or pebbles) before mulching. But they do get a good deal more sun.


Plus: Well situated by shed.
Minus: A ton of gravel covers area.
Not a large space.


Thursday, July 28, 2011

A pile of ... compost

One of the first things I did once we moved into our new digs was to set up some compost bins off to the side of the yard.

Riverside County Master Composters really
know their stuff. At Palm Desert workshop
in June 2011, about 20 residents attended.
At a composting workshop I attended in June, I got two different types: a stackable tower (apparently no longer in production?) and a geobin (the circular, open-top type -- flimsy).

All excited a week or so ago, I collected the kitchen scraps I'd been saving in my freezer, the yard clippings I'd been hoarding in our green-waste trash bin and the grass trimmings I'd been drying in the sun.

Ready to compost!

And ... all these things filled just the stackable tower less than halfway.

I'll keep alternating my yard waste and kitchen scraps in there, but it is going to take a while to get this bin full enough to really go, right?

Wednesday, July 20, 2011

Flailing

We lost our camera at the park during Fourth of July fireworks (which were spectacular).

Timing could not be worse. I want to take pictures of everything right as we are moving in, to get all the "pre" photos.

A new camera is not affordable right now, so I am going to have to come up with something! 

Monday, June 13, 2011

In search of the night-blooming cereus

I’m lucky to work from home, editing gardening articles for an online content company. One of the biggest perks of the job for me is the variety of obscure facts I run across. I adore and seek out random trivia, you see. It’s kind of a curse; I end up spending way too much time looking into odd subjects. The searching takes effort, but it's gratifying because cool things can pop up where you'd least expect them to.
Yeah, the dragonfruit is awesome.
Photo courtesy Wikipedia Commons

Last week, I pulled up an article describing a fascinating cactus plant species (Hylocereus undatus) that produces a huge, stunning flower with an incredible edible: dragonfruit! The fruit is known by many other names, including strawberry pear, pitaya and – wait for it – pitahaya.
 
Palm Desert has a street named Pitahaya. This piqued my interest. Was the cactus grown by the early residents of that area? Do residents still grow it? Or did early community developers just like the sound of the Spanish word? I searched online but could not find much about the reason behind the naming. Tried Palm Desert Historical Society ... I'll try again when it reopens next October. Maybe some knowledgeable resident can shed some moonlight on the subject before then? If you know, let me know!

Anyhow, now I’d been dreaming for a week about growing this amazing night-blooming cereus in my own garden. The enormous white flower opens once and has that one night to be pollinated by bats or moths in order to bear a fruit. You’d think that because it’s a cactus and we live in the desert that we could plop it down and grow it anywhere in the valley. After further research, however, I found that it's native to Central America and grows best in more tropical climates than ours (think Hawaii or Vietnam), but that doesn’t mean we could not grow it here with a little TLC and shade.

A new, humble cereus cutting in my garden.
With this in the back of my mind, a friend and I visited the Moorten Botanical Garden in Palm Springs last weekend. Bingo! The garden had the cactus, sprawling huge, with small unopened buds just waiting to share their awesome bloom and fragrance. I came away inspired by the spectacular variety of desert plants ... and with a small cutting from the kind proprietor – a cereus of my own.

I imagine some night in the future it may bloom, and I'll visit it there in the moonlight. Who knows? It may possibly bear fruit that I'll savor, remembering the first time I marveled that a thing called a dragonfruit could pop up out of such an unassuming cactus.

Monday, May 16, 2011

The Colors of Joy

Large and delicious Green Zebras. Heavenly hue.

Tonight's pasta sauce, freshly picked. A little bit of everything that's ripe: Black Zebra, Green Zebra, Yellow Pear, Siberia, Jubilee

Thursday, May 5, 2011

On a plateau

I can't say much more about this, but for the last few weeks we've been on the verge of a big change in our lives.

Unfortunately, it's the type of thing that is putting everything else in my life on hold (or simple maintenance). Any of the energy I'd normally gear toward starting new projects, blogging, researching or thinking of new challenges has been diverted to this change.

I wonder if this is the most common reason that many people who would like to live more sustainably end up putting it off. They are waiting for a more opportune time?

That's where I find myself now: on a plateau. I've made some progress on the Way of the Green, but am currently unable to make a move due to outside forces.

Do you feel an ebb and flow in your ability to move toward sustainability?

Thursday, April 28, 2011

Mission:Tomato -- Early Harvesting

Check out my "One Hot Tomato" page for the tally of my tomato harvest. "Better Boy" is contributing, along with Siberia and Early Girl.

Tuesday, April 5, 2011

I've found it

I think I can fit this size bin in my back patio, and it does not require worms. Check partway down the page where it says "Build You Own Indoor Bin" under "Indoor Composting."

U.S. EPA: Create Your Own Compost Pile

It's one garbage can inside another.

Saturday, April 2, 2011

"But what about ______? I need paper towels for that."

OK, in response to my earlier Paper towels: Not necessary post, a few people have asked about two potential paper towel must-haves. I think I have an answer for both:

1. Bacon (or other greasy foods). How to cope with food items that require blotting? Or are cooked in the microwave inside paper towels?

Answer: Have a very large white cotton cloth that is for food-oil blotting only. Cook bacon
-- or fry tortillas or fries or tofu -- on the stove in a pan (natch). Then lay out your special cloth on the counter or fold on a plate, and blot the grease the same way you would with paper towels. Hand wash the cloth afterward with a degreasing soap like Dr. Bronner's. It's definitely more work, but you're no longer wasting 10 paper towels to make breakfast.

2. Disgusting messes such as a squished bug or cat barf (or worse). If you've given up paper towels, how do you clean up the occasional extremely gross thing? You would never want to use the cloth again.

Answer: Collect and store thin pieces of cardboard or subscription coupons that fall out of magazines to deal with solid messes. Slide the cardboard piece underneath slowly, then lift. Place on compost pile (if applicable) or throw out. For less solid messes, rip or cut off a piece of your oldest, yuckiest rag to clean up the gooeyness, then throw it on your compost pile (if you've got one) or throw out.

Also, a way to get yourself jump-started without paper towels is to put one of your nice cloths where the paper towels used to be. Just hang it right on the holder. I'm thinking of sewing together the ends of a couple of my best cloths so that they'll be like one of those rolling towels you sometimes see in public restrooms.

Note: I am a cold-turkey, out-of-sight-out-of-mind person, so I don't even keep paper towels in the house anymore -- I would end up using them all the time again! But I could totally see a more strong-willed person being able to have a roll or two around for oil-blotting or super-yuck stuff.

Thursday, March 17, 2011

New Challenge: Composting or Vermiculture

There's a will, but is there a way?

I need some advice with this project. It's possible that many people share my situation, so hopefully we can come up with the right plan.

The problem: No space exists in my home or either of my patios for a compost pile. From what I know, a bin or pile would need to be at least a yard square. I barely have enough room for a small recycling can that has to be emptied a few times a week.

It is highly doubtful that the HOA would agree to a compost pile. I've almost written the thought off altogether. The board is fine with nice-looking veggie gardens -- but compost (and a beginner-composter pile at that), the possibility of flies or vermin, not to mention where to put it ... I don't even want to ask. (Imagining the looks of horror on a few residents' faces is pure comedy.)

But a worm bin? I may be able to fit a worm bin on my upstairs patio, but it may get too hot for that soon. How small can I make it? And can it even be stored outside?

Or maybe a different kind of composting that doesn't take a yard square? What about those composting barrels?

I need something very small that does not smell and can be outside. Please help!

Thursday, June 17, 2010

This is crazy, this is crazy, this is crazy ...

I feel like Clark Griswold from "National Lampoon's Vacation" did as he clapped his hands together right before diving in the pool (skinny dipping).

I just had a wonderful (awful) idea.

After watching a YouTube video of a baby dancing in his diapers, I remembered that at one time I'd wanted to diaper my children in cloth. The hopeful plan soon fell by the wayside--it didn't quite stand up to the reality of an infant's 10 to 12 changes a day.

Reminded of this good intention gone awry, I thought, "Well, it's too late now."

But wait a second. This is called NeverTooLateToGreen, right?

You see where I am going here ...

My daughter Charlotte--17 months--still wears diapers. And though she occasionally uses the potty, she generally goes through 3 to 4 diapers a day.

The challenge: Once the diapers I have are used up (maybe about 25 left) we are going cloth! For real this time.

Thursday, June 10, 2010

You mean you put your clothes outside and they got dry?

(For all you awesome, long-suffering, longtime green people out there, skip this one. It may induce eye-rolling and possibly a gag reflex.)

I couldn't help but be intrigued by the concept of line-drying (as though it were something new and humans haven't been doing it for thousands of years), but it is new ... to me ... as a modern, suburb-grown person who never even considered putting wet clothes outside. Why should I ever have, when my own personal clothes dryer has sat there beckoning, offering tumbled ease?

So anyway, it worked like crazy! The weather (100-plus degrees, very sunny, slight breeze) aided my task. I cheated a little by keeping all socks separate and throwing them in the dryer for one big sock load. Other tips: Use vinegar as a natural fabric softener. Avoid windy days. Towels get scratchy this way. (Help, please?)

This is how to do it:

1. Keep the kids inside and occupy them with something.

2. Tie a strong piece of string or twine very tightly between two sturdy points, preferably at least 5 feet up and more than 10 feet apart. A long nail hammered into a wood panel worked as a point for me.

3. Fetch wet clothes from washer and carry outside in a basket. Shake each piece well and attach with clothespins to line. A clothespin makes a small hole near the middle of the pinch through which a string can run smoothly, then clothing is clasped separately by the end of the pinch. Surprisingly strong.

4. Put larger items near ends of clothesline, smaller items near middle where it sags. Use two pins for larger items and one for undergarments.

5. Start next load in washer.

6. Check dryness of clothing after an hour or so, when next load is finished in washer.

7. Take down each dry item, shake it and then fold it into a basket. Voila.

Putting up and taking down clothes took 5 to 10 minutes each time. I probably will continue to line dry my clothes; it wasn't too tough. But the socks and towels may still get tumble dried.

Sunday, May 30, 2010

Next project ... on the line

When we first moved into our house in 2004, this strange round contraption was attached to the wall of our enclosed patio, about 6 feet high. It took me a few weeks to get around to inspecting it closely enough to figure out it was a clothesline.

Ingenious, in good working condition, and probably about 25 years old. If you pulled it all the way out, you could attach it to a hook that was installed on the opposite wall. And it wound up like a tape measure when you let it go.

Forgive me, but I promptly detached it from the wall and threw it away. (See where it used to be, at left) Looking back, I think I didn't like how it was right outside the sliding door where you could almost hit your head on it. And I probably thought I would NEVER dry my clothes outside because I finally had my own dryer.

My goal this summer is to make use of the intense desert heat, and save some energy at the same time. I love my dryer, but it heats up the house as I'm air-conditioning it.

Seriously, it probably will take LESS time to dry my clothes in the bone-dry 110-degree sun! Can't wait to try this. On the lookout for a new (or used) contraption similar to the old one.

Wish I had some foresight back in 2004.

Tuesday, April 27, 2010

Keep the produce (relatively) local

Last couple months have been pretty busy. But I am ready to go at this green thing again. Got a few ideas percolating in the noggin.

The test for this week:

Not going too crazy on this for now. Instead of going hyper-local, 100-mile radius, I will limit all produce purchases to seasonal and North American. Nothing against Chile or New Zealand, but I'm going to keep it on this continent. The seasonal is going to be the hard part, so I've got to do some research.

Monday, January 18, 2010

Feeling sheepish

Now that I've had a few days to think (and been employing my new friend vinegar left and right), I am wondering why I never got around to doing this before. Just the small amount of time needed to try out something new. It really is no trouble at all. And you wouldn't believe the number of super-chemical cleaners I have -- and how little I use them. It doesn't make sense in so many ways, and especially on a financial level.

Anyway, starting this blog is going to be the impetus for many, many lifelong changes. And I hope not just for me, but for anyone reading this blog who -- like me -- just hadn't gotten around to being green yet.

Friday, January 8, 2010

A start is a start

So I love the idea of living more "green" or "sustainably." But I'll definitely admit that going green is easier said than done.

Yes, I am somewhat green. But those efforts are simple one-offs (like changing incandescent light bulbs to fluorescents) or have become rote (such as putting - most - recyclables in a different bin). I can do much more.

The bigger things take more time or effort than I have yet been able to allot. I don't know, I guess I've just been too busy. I have two very young kids and I work from home.

But my intention has been just intention for too long, I want action. I want to take the steps toward living more sustainably that constitute a real change in my life.

Will you come with me?